


(Just love this bridge) Big thanks to my sister for helping me with my pictures!!
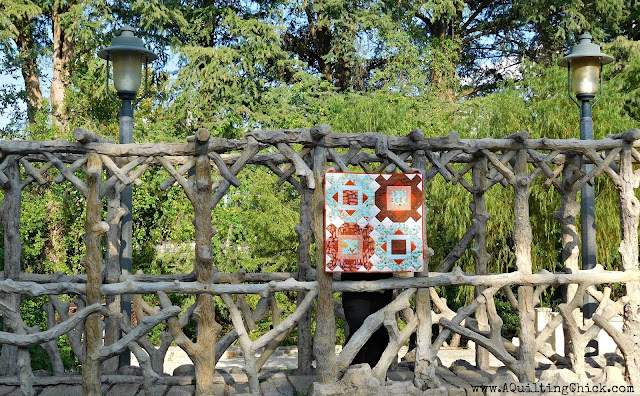
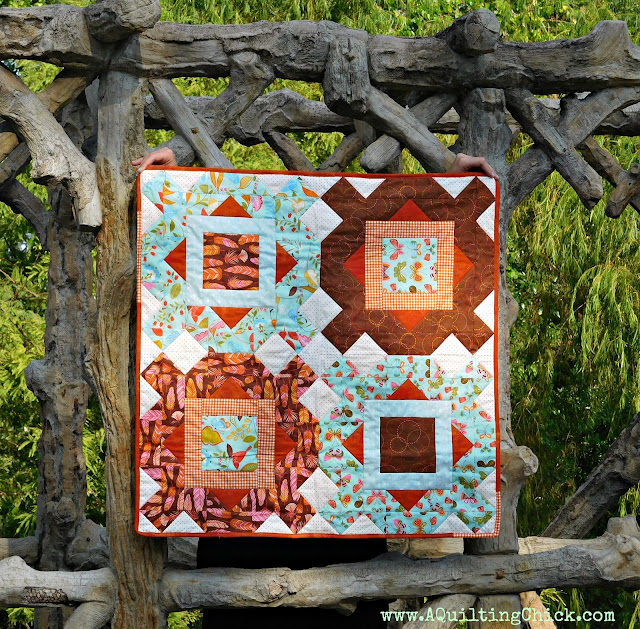
Isn't it pretty?!? The fabrics are so pretty and such fun to work with. As I said, the fabric is Ft. Worth Fabric Studio's Friday Bundle, Fly Away.
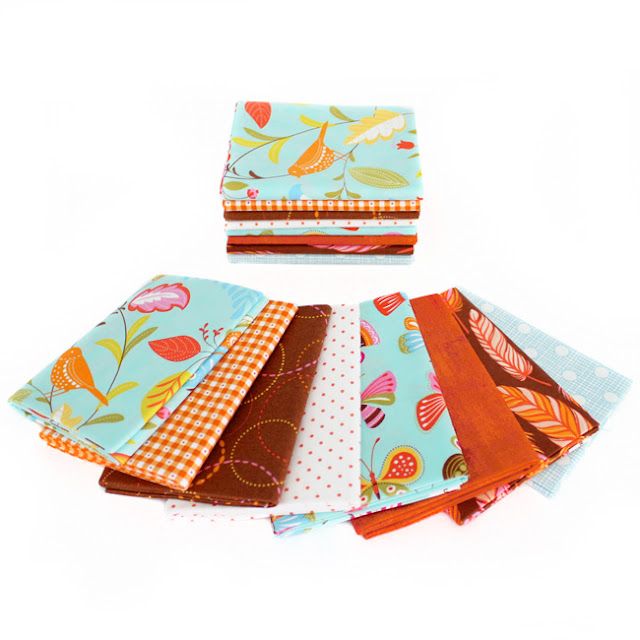
I had so much fun making this table topper. It finishes out around 32" square.

Today I'll teach you how to make my Fleur de L'Amour blocks and this gorgeous table topper.
I just love these!
So are you ready?? Let's get started!
Cutting
From the Essential Dots White/Tangerine, cut:
(8) 5-1/4" squares
(4) 4-1/2" squares

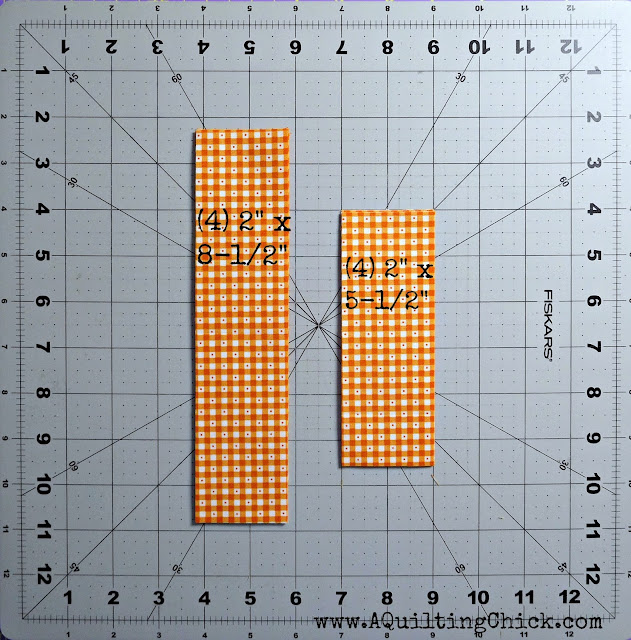
(4) 2" x 8-1/2"
(4) 2" x 5-1/2"
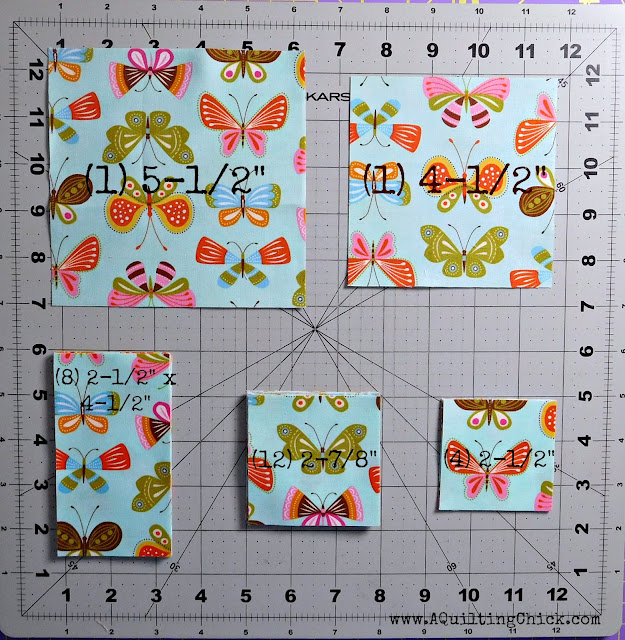
From each of your four main fabrics (Wing & Leaf Main Print Robins Egg, Wing & Leaf Ring Toss Chestnut, Wing & Leaf Butterfly Flutter Robins Egg, and Wing & Leaf Feathers Chestnut), cut:
(8) 2-1/2" x 4-1/2"
(12) 2-7/8" squares (draw line on back along the diagonal)
(1) 5-1/2" square
(1) 4-1/2" square
(4) 2-1/2" squares
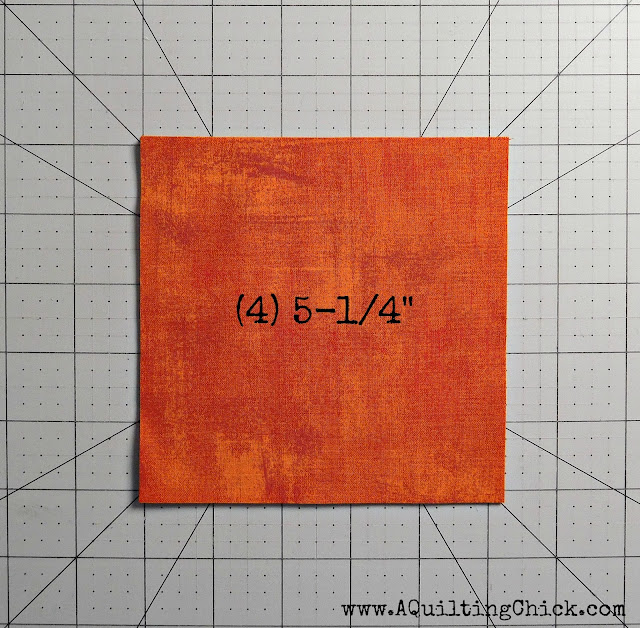
From the Grunge Basics Pumpkin, cut:
(4) 5-1/4" squares
Block Assembly
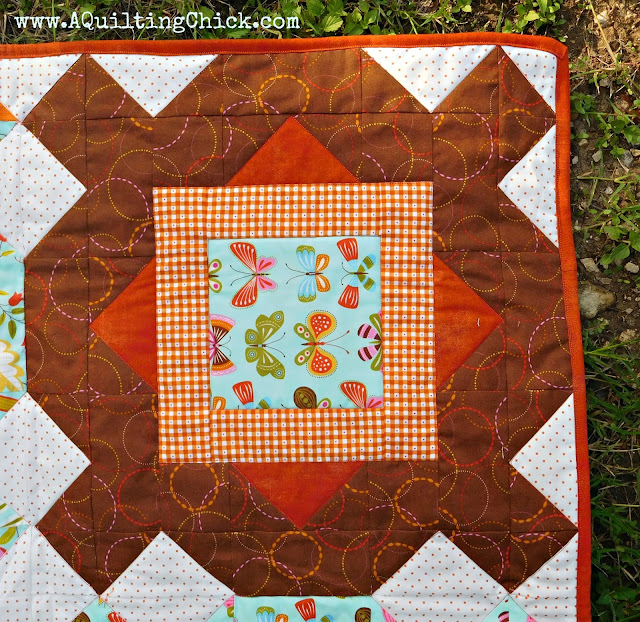
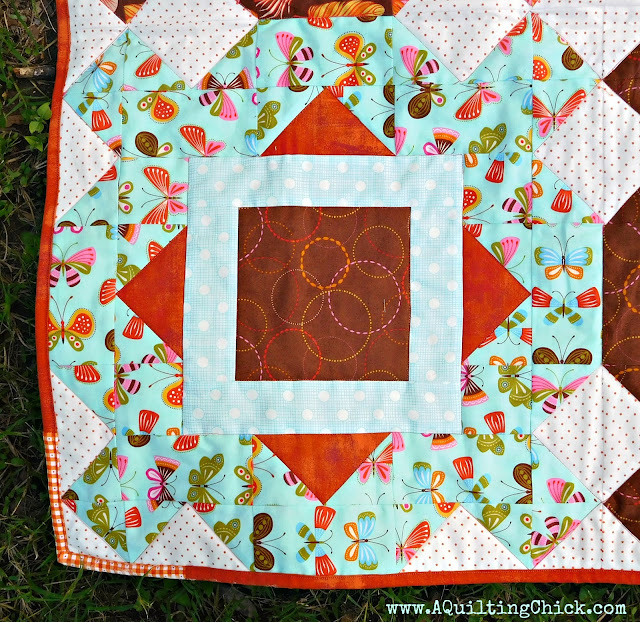
Using all of your 5-1/2" squares, and your 2" x 5-1/2" and 2" x 8-1/2" rectangles, create your block centers by bordering the 5-1/2" squares, using the picture below as a guide. I used the orange to wrap around the aqua and the blue with dots to wrap around the brown.

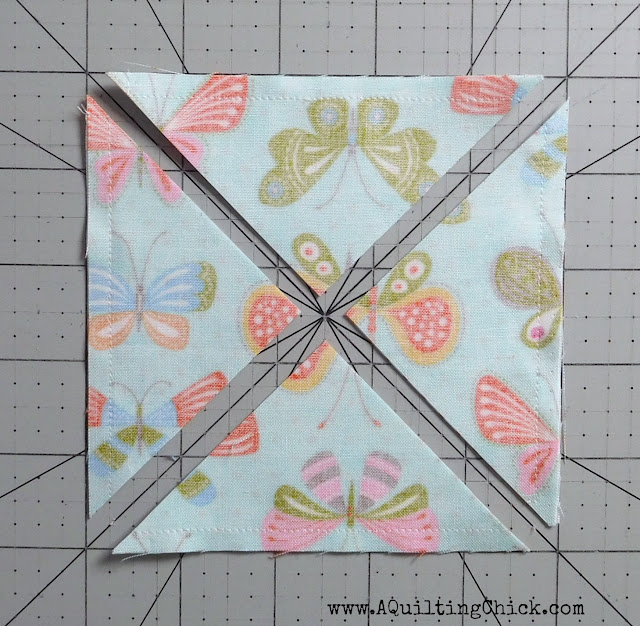
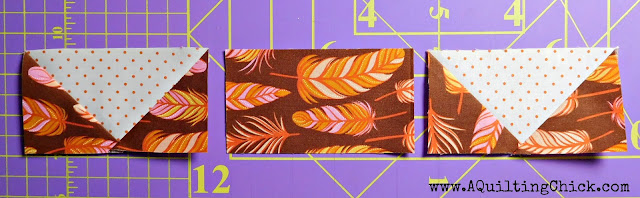
Now we are going to make our half square triangles. Take each of your 4-1/2" squares, matching up your background squares with a main fabric square, and pin, right sides together on all sides as shown.

Stich squares together on all four sides. Using the 45-degree angle lines on your mat, cut each set of 4-1/2" squares in half on both diagonals as shown below. Press open and trim, squaring up to 2-1/2".
Place (2) 2-7/8” main color squares on top of (1) 5-1/4” pumpkin square and (2) 5-1/4" background square, right sides together, as shown. The center corners will overlap. Pin as shown. Sew a 1/4” seam on each side of the diagonal line.

Cut on your drawn diagonal line and press open.

Pin a 2-7/8” square to the corner of your partial flying geese. Pin as shown. Repeat for all of the partial flying geese pieces. Sew a quarter inch seam on both sides of your drawn line. Cut on your drawn line and press open. You will now have 4 flying geese units. Square each unit to 2-1/2" x 4-1/2".

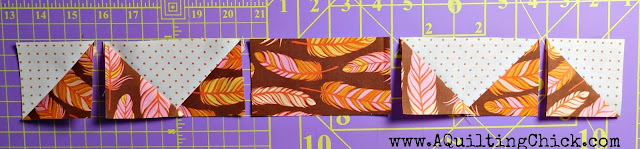
Using your pumpkin flying geese units and your 2-1/2" squares, make two of the below units for each main fabric set.

Using your pumpkin flying geese units and your 2-1/2" x 4-1/2" rectangles, make two of the below units for each main fabric set.

Using the picture below as a guide, use these two side units and your center units to create the middle section of your blocks as shown below. I matched my feathers with my birds and the circles with the butterflies. "Birds of a feather, stick together." :)

Using your half square triangles, your background flying geese units and a 2-1/2" x 4-1/2" rectangle, make two of the below units for each main fabric set.
Using your background flying geese units and a 2-1/2" x 4-1/2" rectangle, make two of the below units for each main fabric set.
Using the picture below as a guide, use these two side units and your new center units to create your blocks as shown below.

And that's it!!! Arrange your blocks in a pleasing manner and join them together to make your table topper, quilt, and bind!

I used the scraps from the pumpkin grunge and gingham to make a scrappy binding Just in case you want to do the same, I used 2" strips to make a narrow binding since it's a smaller quilt. It took 7 strips from the fat quarters (cut the long way on the fat quarter).

Don't you just love it?!? This is destined to go to my daughter. Her new apartment has a very large center island and this will look lovely in the middle!!

Go grab the Friday Bundle at Ft. Worth Fabric Studio and make one for yourself!!! I'd love to see it, so please share!!! Hope you enjoy your weekend!!
Linking up with Crazy Mom Quilts, Confessions of a Fabric Addict, Busy Hands Quilts, and My Quilt Infatuation.
Linking up with Crazy Mom Quilts, Confessions of a Fabric Addict, Busy Hands Quilts, and My Quilt Infatuation.
Hi Cathy,
ReplyDeleteThank you for sharing the tutorial! I love those fabrics - what a diverse collection. My favorite is the white/tangerine dots! ~smile~ Roseanne
I love your pattern, and how it finished up. Beautiful fabrics too. Thank you for sharing the pattern. Hugs,
ReplyDeleteThanks for the great tutorial. I do like that block, and it's super in those fabrics.
ReplyDeleteThanks.
ReplyDelete