A Quilting Chick Home Page About Me  My Quilts  My Patterns  Follow Me Tutorials

March 19, 2018

Fancy That! Quilt Along - Step 2

Looks like y'all have been having as much fun as I have with this quilt along!  I've really enjoyed seeing all of your panels popping up on social media!

This week, we are making the sawtooth stars to fill in our large blocks.  You need a total of (15) 12-1/2" blocks.  So just subtract however many 12-1/2" panel blocks you got ready in the last step from the (15), and that's how many sawtooth stars you need to make.

In my case, I have (8) panel blocks in the large size so I need to make (7) sawtooth stars.


Cutting Instructions:

For each sawtooth star, you'll need:

Main Fabric
(4)  3-7/8" squares, draw line on diagonal

(1)  6-1/2" square

Background Fabric
(1)  7-1/4" square
(4)  3-1/2" squares


Sewing Instructions:

Place (2) 3-7/8” squares on top of (1) 7-1/4” square, right sides together, as shown.  The center corners will overlap.  Pin as shown.


Sew a scant 1/4” seam on each side of the diagonal line as shown.  


Cut on your drawn diagonal line and press open.  You will have two pieces that look like the picture to the right.


Pin a 3-7/8” square to the corner of your partial flying geese.  Pin as shown.  Repeat for both of the partial flying geese pieces.


Sew a scant quarter inch seam on both sides of your drawn line, as shown.


Cut on your drawn line and press open.  You will now have 4 flying geese units.  Square up to 3-1/2 x 6-1/2”. 


Arrange (4) flying geese units with (1) matching 6-1/2” square and (4) 3-1/2” background squares as shown.  Sew into three rows.  Press seams away from the flying geese units.


Layer the top and bottom row over the middle row as shown.  Pin along the long edges and sew.


Press open. You've now completed your sawtooth star!  Remember, you need to repeat this until you have a TOTAL of (15) 12-1/2" blocks.

Here's a few of mine:


Now, think about this though.  ANY 12" BLOCKS WILL WORK!!!  I'm giving you the instructions for the sawtooth stars, but feel free to make this your own!  If there is a different block that will make your quilt pop, that fits with your focus fabric, then feel free to switch that with the stars!  Tomorrow, I'll show you the changes I made for my Valentine's version of Fancy That!

Can't wait to see your blocks!!!  Be sure to tag me and #FancyThatQAL in your social media posts!!

March 5, 2018

Fancy That! Quilt Along - Step 1

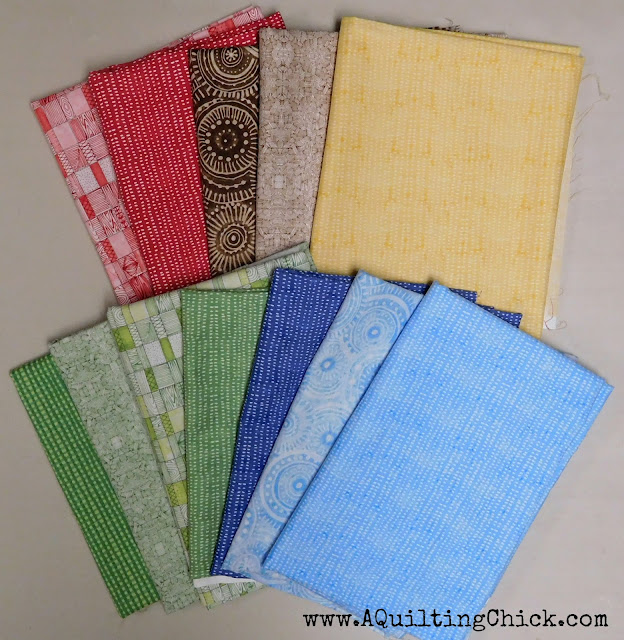
Yay!  I'm so super excited that it's time to get started on the Fancy That! Quilt Along!  This week, we're going to start with getting our panel/focal fabric blocks ready.

This quilt is designed to use 3 different size blocks:  12, 8, and 4-inches.  That allows for panel blocks in many sizes.  The first step is to decide which category your panels fit best.  You can use up to (15) panels in the 12" size, (28) panels in the 8" size, and (68) panels in the 4" size.

Let's start with the 12" panels and work our way down:

12" Panel Blocks

When you are cutting out your panel blocks, it's important to keep in mind that we are adding borders to them to get them to size and how big those strips will be.  I try to keep it in half inch increments and not at the EXACT finished size, so in this case, try not to trim these to 12".   Anything up to 11-1/2" or go to 12-1/2" exactly, but don't do 12".  Trying to sew such a thin strip to the ends is doable, but difficult.  For example:


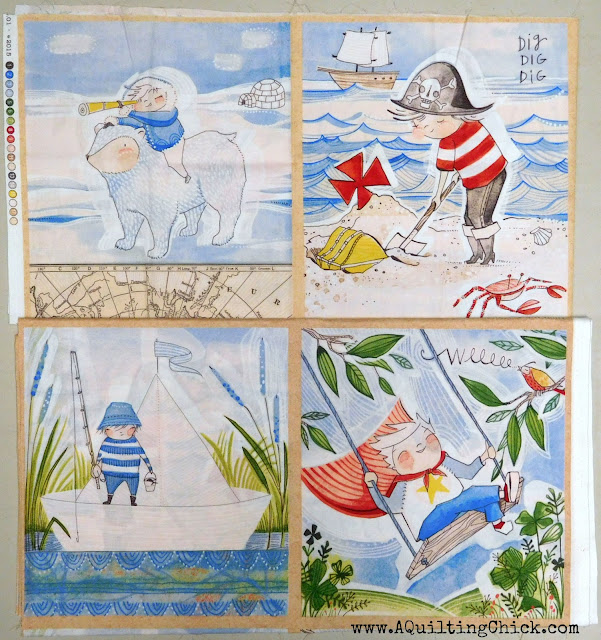
I'm using The Adventurers fabric designed by Cori Dantini for Blend Fabrics for my quilt (aren't they cute!) and as in most cases, the panels aren't square.  I trimmed my large squares to 10-1/2" wide  x 11-1/2" high.  Now here's the math that we are using for the sides of the 12" blocks:

13.5 - (cut block width) = x
x divided by 2 = y
cut (2) strips y x block height

In my case that is:

13.5 - 10.5 = 3
3 divided by 2 = 1.5
cut (2) strips 1-1/2" x 11-1/2"

And then we need the strips for the top and bottom:

13.5 - (cut block height) = x
x divided by 2 = y
cut (2) strips y x 12-1/2"

In my case that is:

13.5 - 11.5 = 2
2 divided by 2 = 1
cut (2) strips 1" x 12-1/2"

Doing the math is really the hardest part of the quilt. I've created a project planner for you that you can download here.  It's not nearly as hard as it seems but that should help if you're having trouble.  Here's where we stand:


Now, starting with the sides of your block, sew your strips to the panel using a 1/4" seam.  Then do the top and bottom.  You'll end up with a 12-1/2" square.


I've got a second version going in Valentine's Day themed fabrics too:


8" Panel Blocks

We will be doing the same thing with our medium size blocks.  Trim your blocks to size, anything from 5" to 8-1/2" in half inch increments, skipping 8" if you can.


Originally, I really wasn't paying attention and trimmed to 5" x 8" but caught myself quickly.  Cutting a 3/4" strip to attach to the top and bottom would be doable but no fun at all.  So I trimmed everything to 8-1/2" high by 5" wide.  Here's the math:

9.5 - (cut block width) = x
x divided by 2 = y
cut (2) strips y x block height

In my case that is:

9.5 - 5 = 4.5
4.5 divided by 2 = 2.25
cut (2) strips 2-1/4" x 8-1/2"

And then we need the strips for the top and bottom:

9.5 - (cut block height) = x
x divided by 2 = y
cut (2) strips y x 8-1/2"

In my case, I cut mine to the needed height, so no strip on top and bottom is needed.

8.5 - 8.5 = 0
0 divided by 2 = 0
no strips needed


Attach your strips to the sides then the tops and bottoms.


And my second set:


4" Panel Blocks

In my case, I had a perfect focal fabric to play in this spot, so I cut some blocks to 4-1/2" and called it good.


But you may have some small prints that would look cute in these small blocks.  So let's assume you have some cute 2-1/2" squares that will play nicely in the small blocks.  Here's your math:

5.5 - (cut block width) = x
x divided by 2 = y
cut (2) strips y x block height

In my case that is:

5.5 - 2.5 = 3
3 divided by 2 = 1.5
cut (2) strips 1-1/2" x 2-1/2"

And then we need the strips for the top and bottom:

5.5 - (cut block height) = x
x divided by 2 = y
cut (2) strips y x 4-1/2"

In my case that is:

5.5 - 2.5 = 3
3 divided by 2 = 1.5
cut (2) strips 1-1/2" x 4-1/2"

And that's it for the first week of our quilt along!  Just get your panel blocks made and bordered.  I know not everyone is good at math.  I promise this is the most complicated that it gets and I'm hoping the worksheet helps those of you that get confused.  If you have any questions at all, please let me know!  I'll be glad to help out!  Can't wait to see your panels.  Please use #FancyThatQAL on your pics so I can see!!

We're going to keep this quilt along laid back, so every two weeks.  I'll have your next step posted on 3/19!!!


March 1, 2018

Fancy That! Quilt Along Fabric Choices

I cannot even begin to tell you how excited I am for this quilt along!  Are y'all ready???  It took me longer to post my fabric choices than I expected because.....Blend Fabrics so graciously agreed to send The Adventurer's fabric by Cori Dantini for my use!  And.....they sent enough that I have some to share!! :)  Isn't this fun?!?

If you've been a follower of my little spot in blogland for any length of time, you know that I am a HUGE fan of Cori Dantini.  She is a wonderful artist and her fabrics pull at my heartstrings.  That being said, how perfect are these:

 The Adventurer's by Blend Fabric

Those will be some of my larger focal fabrics.  Now look at these:

 The Adventurer's by Blend Fabric

The little pirates!  I can't even!  These will play well into the spaces for smaller focal fabrics.  And then we have my supporting fabrics:

 The Adventurer's by Blend Fabrics

Y'all, I know exactly which little boy is getting this quilt and can I just say, it's going to be fantastic!  I might have trouble parting with this one.

Now I've decided that we will do the giveaway at the end of our quilt along.  To be entered, all you'll need to do is link up a picture of your finished top! :)  Play along, and you'll have a great chance to win!

Remember, here is the original Fancy That:

 Fancy That

And here is another version (still need a better pic, forgive me) without the panel prints, just larger focal designs:

 Fancy That

I've already got a modified version about halfway done piecing using a Valentine's theme that I'll be sharing along our journey and my sister is going to make another version so you can see yet another take!

March 5th!!!  I'll say it again, "Are y'all ready?!?"

Linking up with Crazy Mom Quilts, My Quilt Infatuation, and Confessions of a Fabric Addict.