


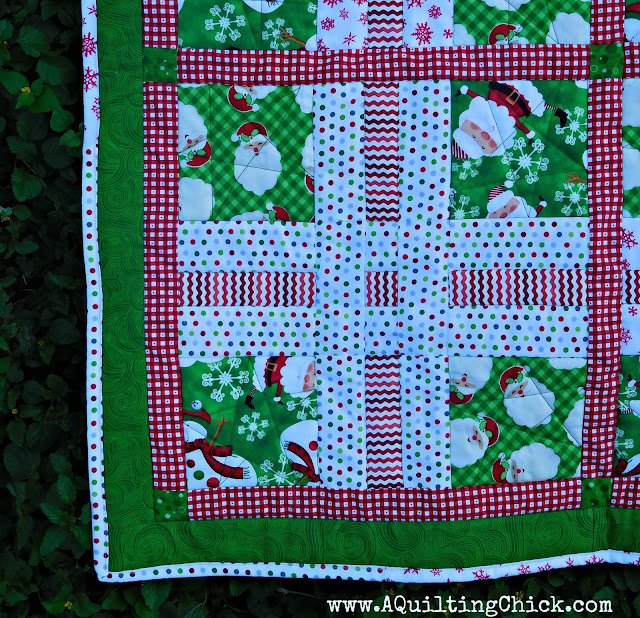
Isn't this a fun little table topper?!?

The entire top and the binding come from Ft. Worth Fabric Studio's Friday Bundle today, Dear Santa:

You can easily make this cutie over the weekend and have it ready in plenty of time for Christmas.
My daughter has claimed this for the island in her kitchen. It'll make a great Christmas present too! You're going to love how easy it is and I can see it in so many different colorways! I can't wait to see your version!
Are you ready to get started? Go grab your Friday Bundle and let's go!
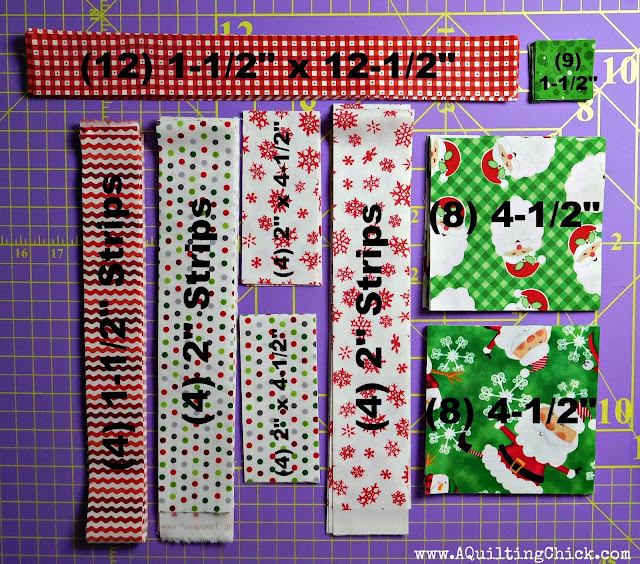
Cutting:
(8) 4-1/2" squares from each:
- Holly Jollies Green Toss - Quilting Treasures
- Christmas Cheer Jolly Old Elf Green - Patrick Lose Fabrics
(12) 1-1/2" x 12-1/2" from the Sorbet Essentials Gingham Red - Quilting Treasures
(9) 1-1/2" squares from the Basically Patrick Bubbly in Grasshopper - Patrick Lose Fabrics
(4) 2" strips and (4) 2" x 4-1/2" from each:
- Holly Jollies Multi Dot - Quilting Treasures
- Elf on the Shelf Snowflakes - Quilting Treasures
(4) 1-1/2" strips from the Sorbet Essentials Rick Rac Red - Quilting Treasures
(7) 2" strips from the Just Color Green - Studio E
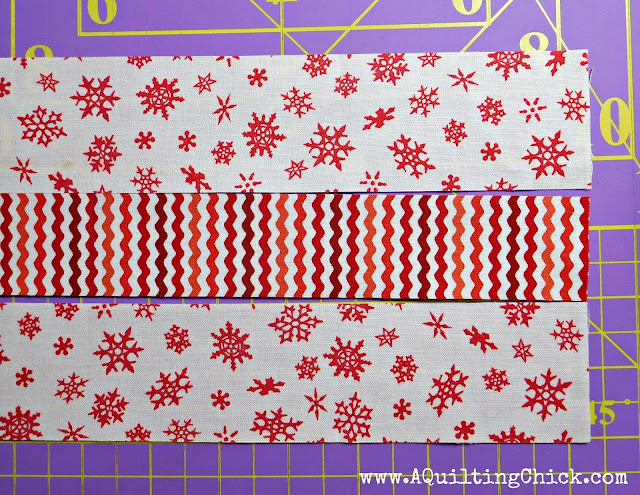
Assembly:
We are going to start with some strip sets. Using the rick rac strips and the polka dot/snowflake strips create two of each of the following strip sets:
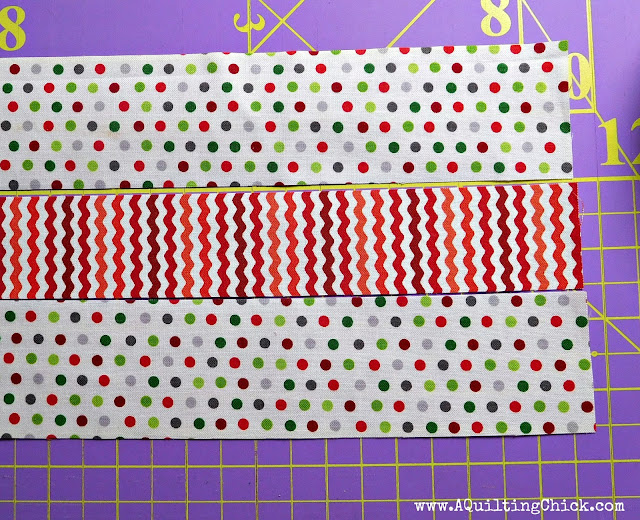
Next, we are going to subcut these strip sets into (8) 4-1/2" and (2) 1-1/2" sections for the snowflake and polka dot colorways.

Using the 1-1/2" pieces from your strip sets and the 2" x 4-1/2" rectangles, create (2) of the following from both the snowflake and polka dot colorways:

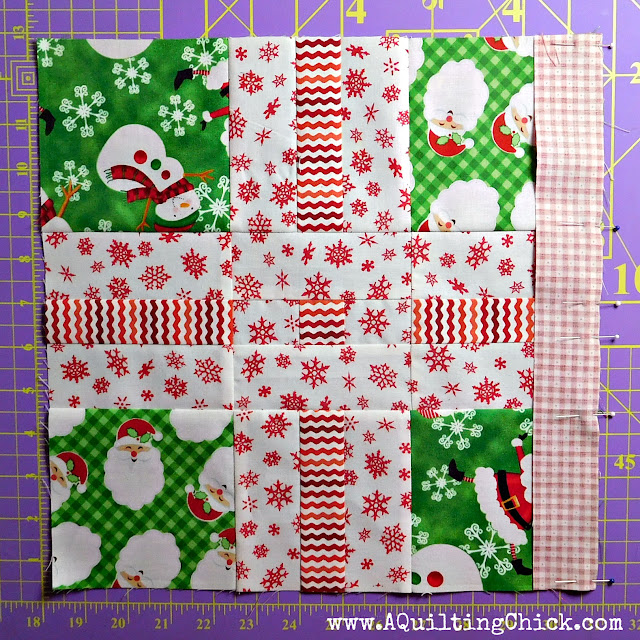
We have all of our block parts complete so let's start assembling the blocks. We are making (2) blocks from both the snowflake and polka dot colorways. Layout the blocks as shown and assemble:

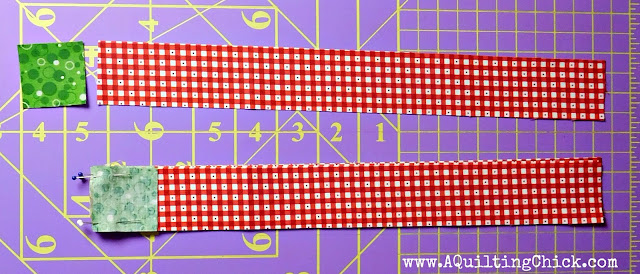
Using the gingham strips and the bubbly green squares, sew (8) sashing strips as shown:
Attach a gingham strip to the side of each of your completed blocks as shown:
Attach a sashing strip with cornerstone to the bottom of each block as shown:
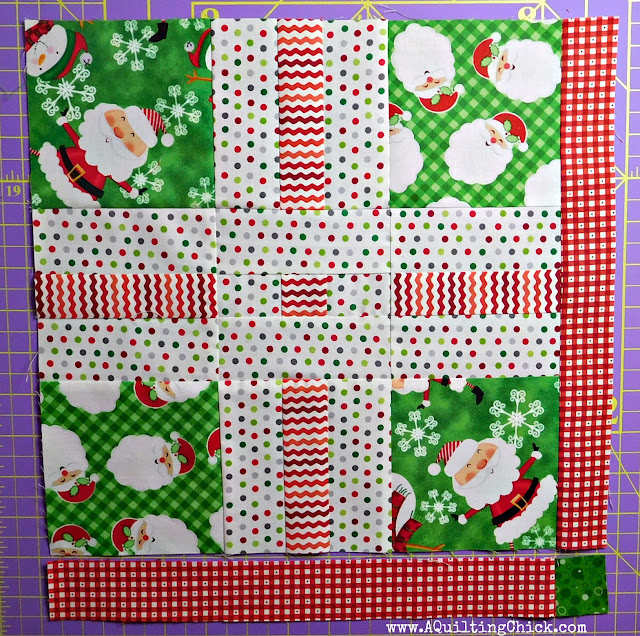
Layout the blocks as shown, watching the placement of the snowflake/polka dot colorways and assemble the quilt center:

Join (2) sashing strips together, end to end. Make (2).

Attach one of these long sashing strips to the top of your quilt center. Add a cornerstone to the end of the other sashing strip:

Add this sashing strip to the last side of your quilt center. Sew all of the 2" Just Color Green - Studio E strips together along the short side to create one long strip. Measure the diameter of your quilt through the center and cut (2) pieces this length and attach to the sides of your quilt top. Measure the new width of your quilt center and cut (2) pieces this length and attach to the top and bottom of your quilt top.
And your top is complete!! Mine finished right around 31" square.
I used the leftover snowflake and polka dot fabrics to create my binding using 2" strips since it's such a small project.

I truly hope you enjoy making this one as much as I did! Please share your versions as I'd love to see them!!

Until next time!!
Linking up with Crazy Mom Quilts, Confessions of a Fabric Addict, Busy Hands Quilts, and with TGIFFriday at Janda Bend Quilts.
Hi Cathy,
ReplyDeleteWhat fun fabrics! I especially love the ric rac fabric, and of course I love all things Christmas. This looks like it would be fabulous on an island - I can see why your daughter claimed it. ~smile~ Roseanne
ANOTHER wonderful design! I'm saving this until I finish my two Christmas QALs to see if I can get a scrappy version out of them. Thank you for sharing your design. I'm sitting on my hands not to order the bundle, or the snowman one, because it would be adorable this way, too!
ReplyDeleteWhat a wonderfully fun design - all you need is hot chocolate and mince pies and you're all sorted!
ReplyDeleteAnother fun quilt pattern to bookmark. It looks fantastic! It would be fun to do this as a quilt along and see what different colorways people come up with. Have a great weekend! Andrea
ReplyDeleteReally nice table topper ! Thanks so much for the tutorial
ReplyDeleteHow many bundles did you use for this? Or am I just missing it in your descriptions? Thank you!
ReplyDeleteHi Cerissa, Just the one bundle. No need for multiples. Enjoy! Cathy
ReplyDelete